Clinic chop and doctor e-signature
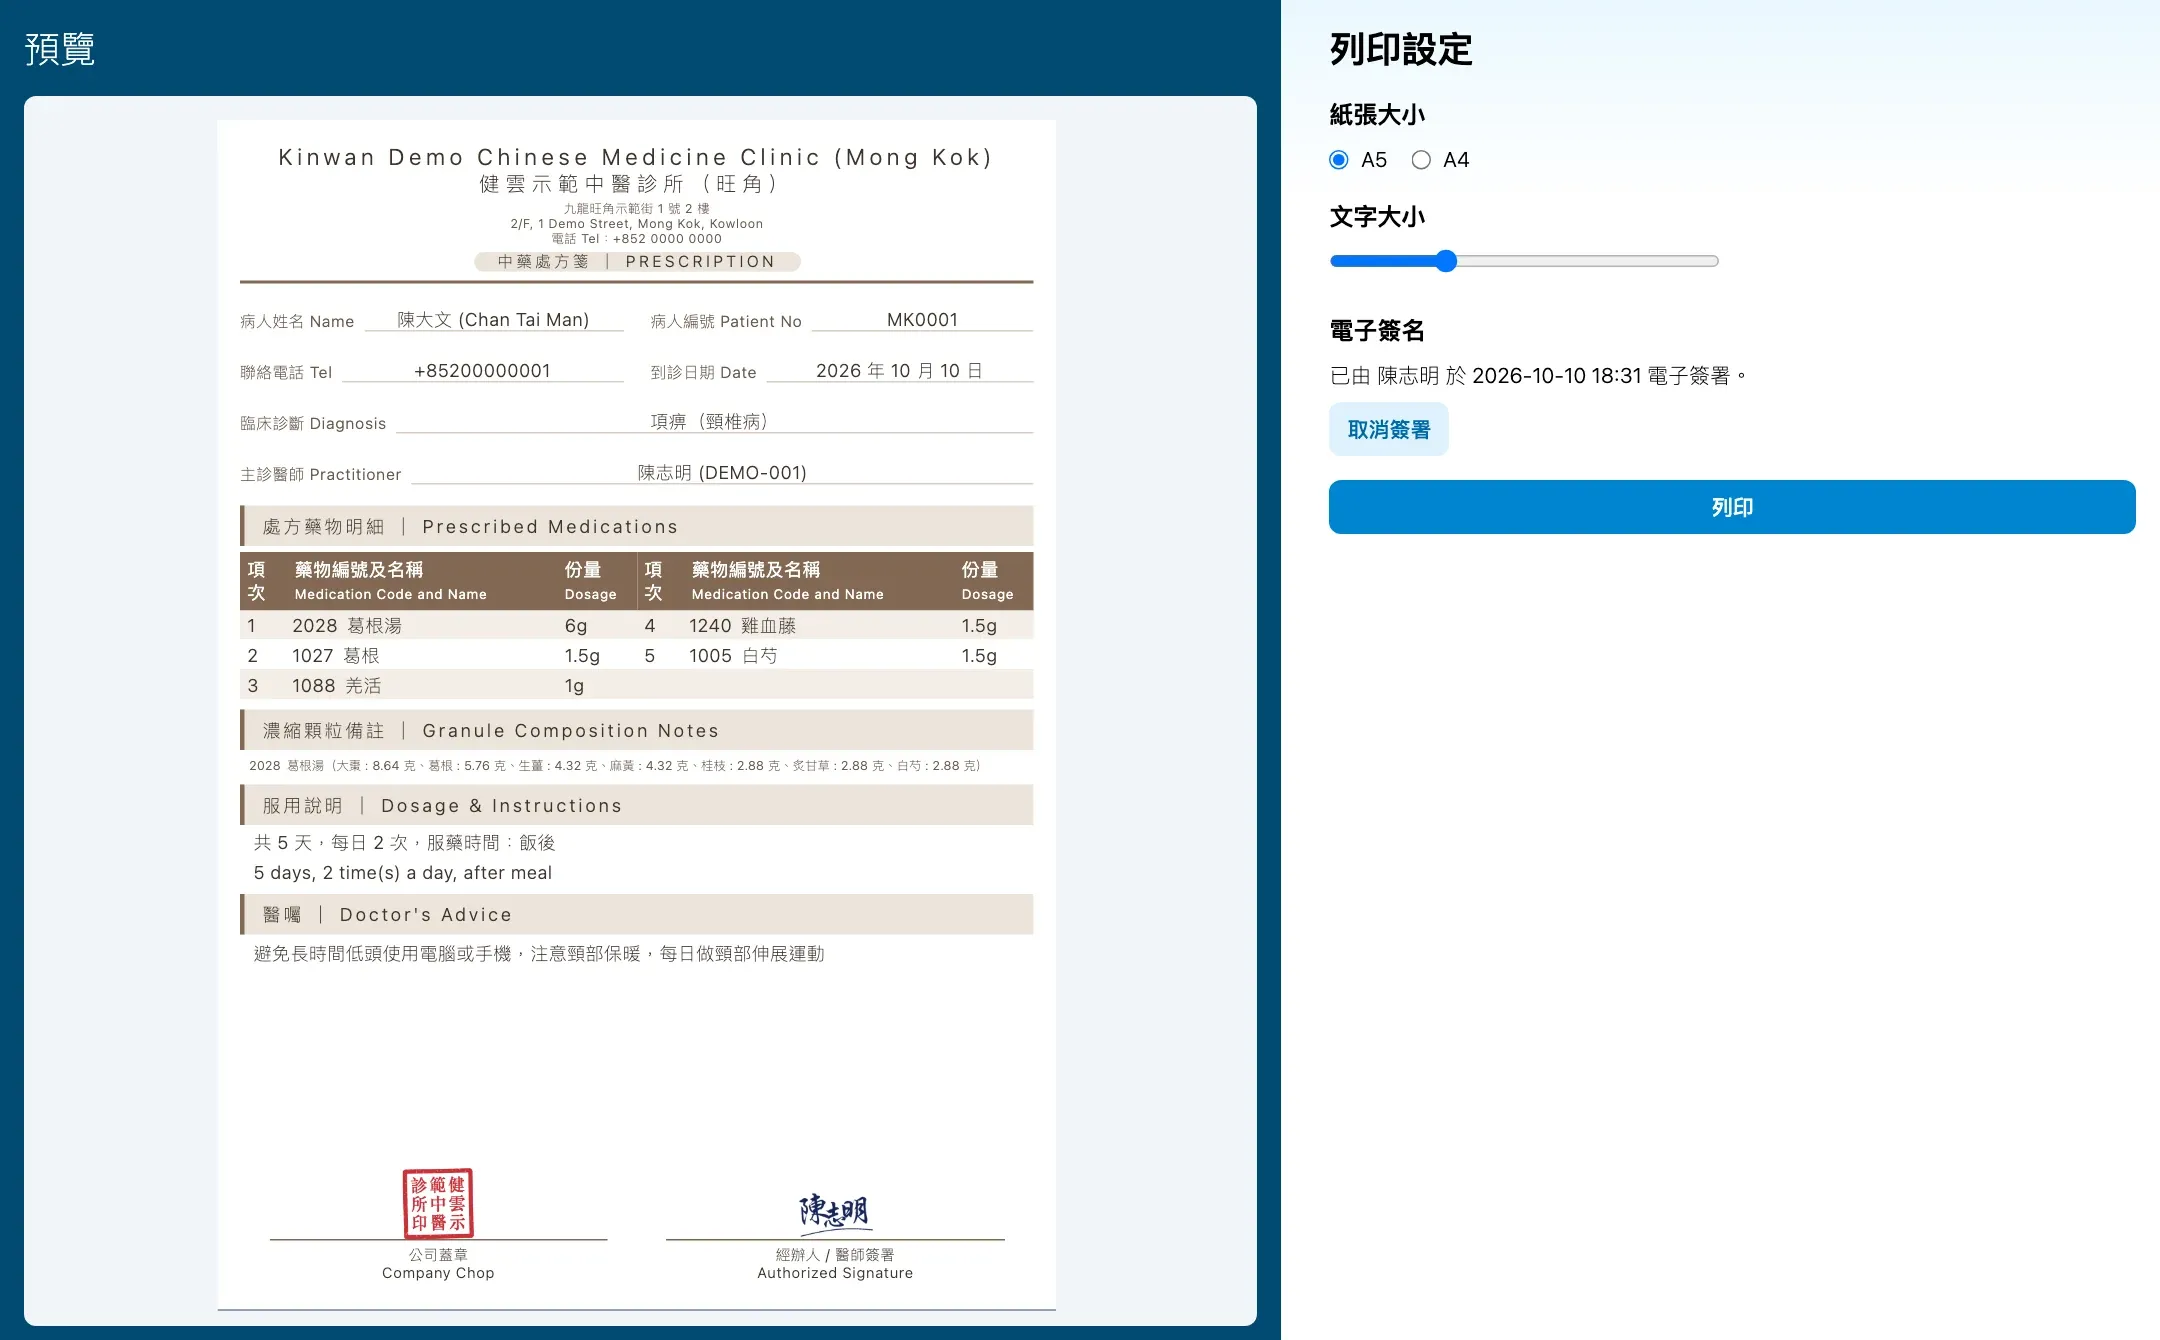
Prescriptions, receipts, sick-leave and attendance certificates can carry the doctor’s own e-signature, and prescriptions, receipts and insurance invoices the clinic chop, with no stamping or signing by hand. Each doctor sets a signature once, then presses 簽署 (sign) on the print page and confirms.
What it does
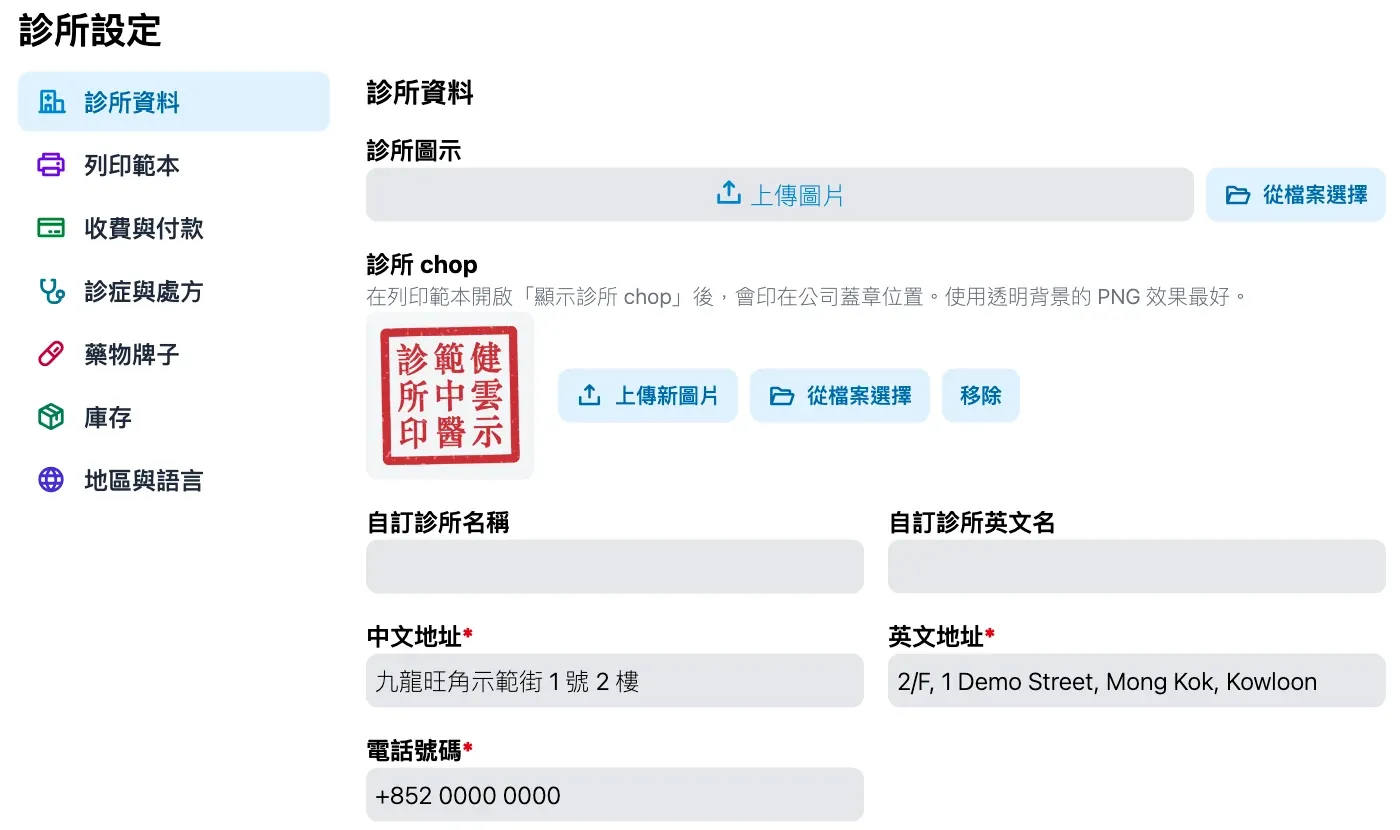
- Clinic chop: upload an image of the chop, then crop, rotate and remove its white background in Medicloud.
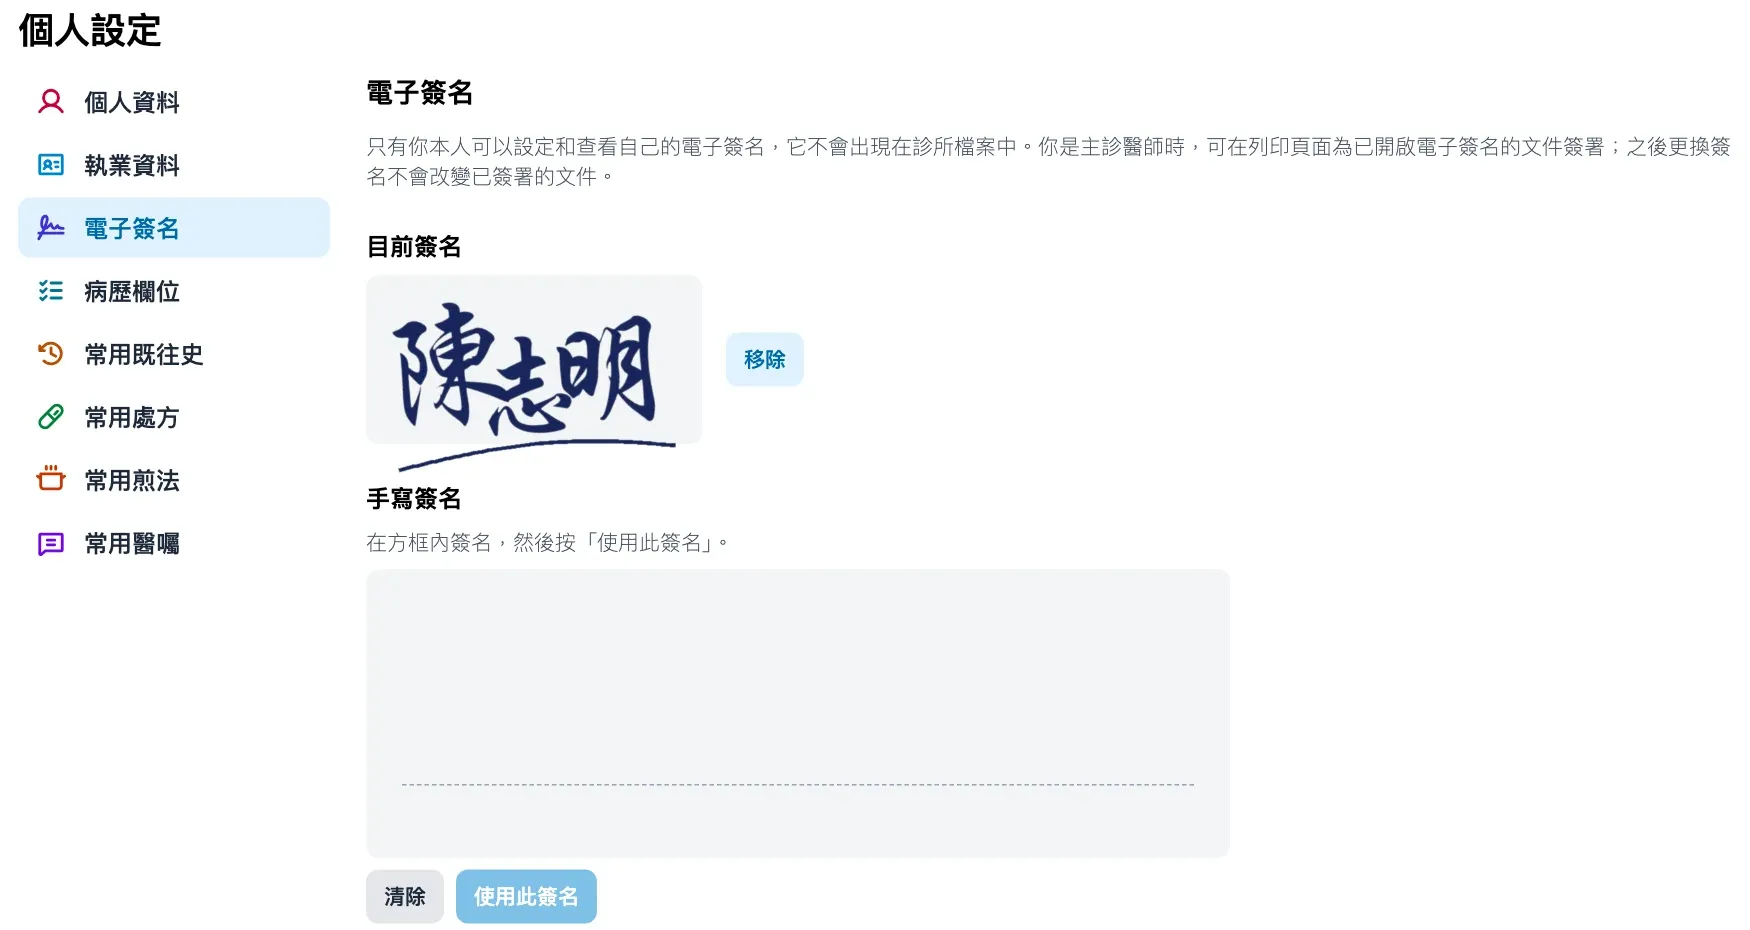
- Doctor signature: draw it on screen or upload an image. Only the doctor can see or change it.
- Only the record’s own doctor can sign. Other staff can print a signed document.
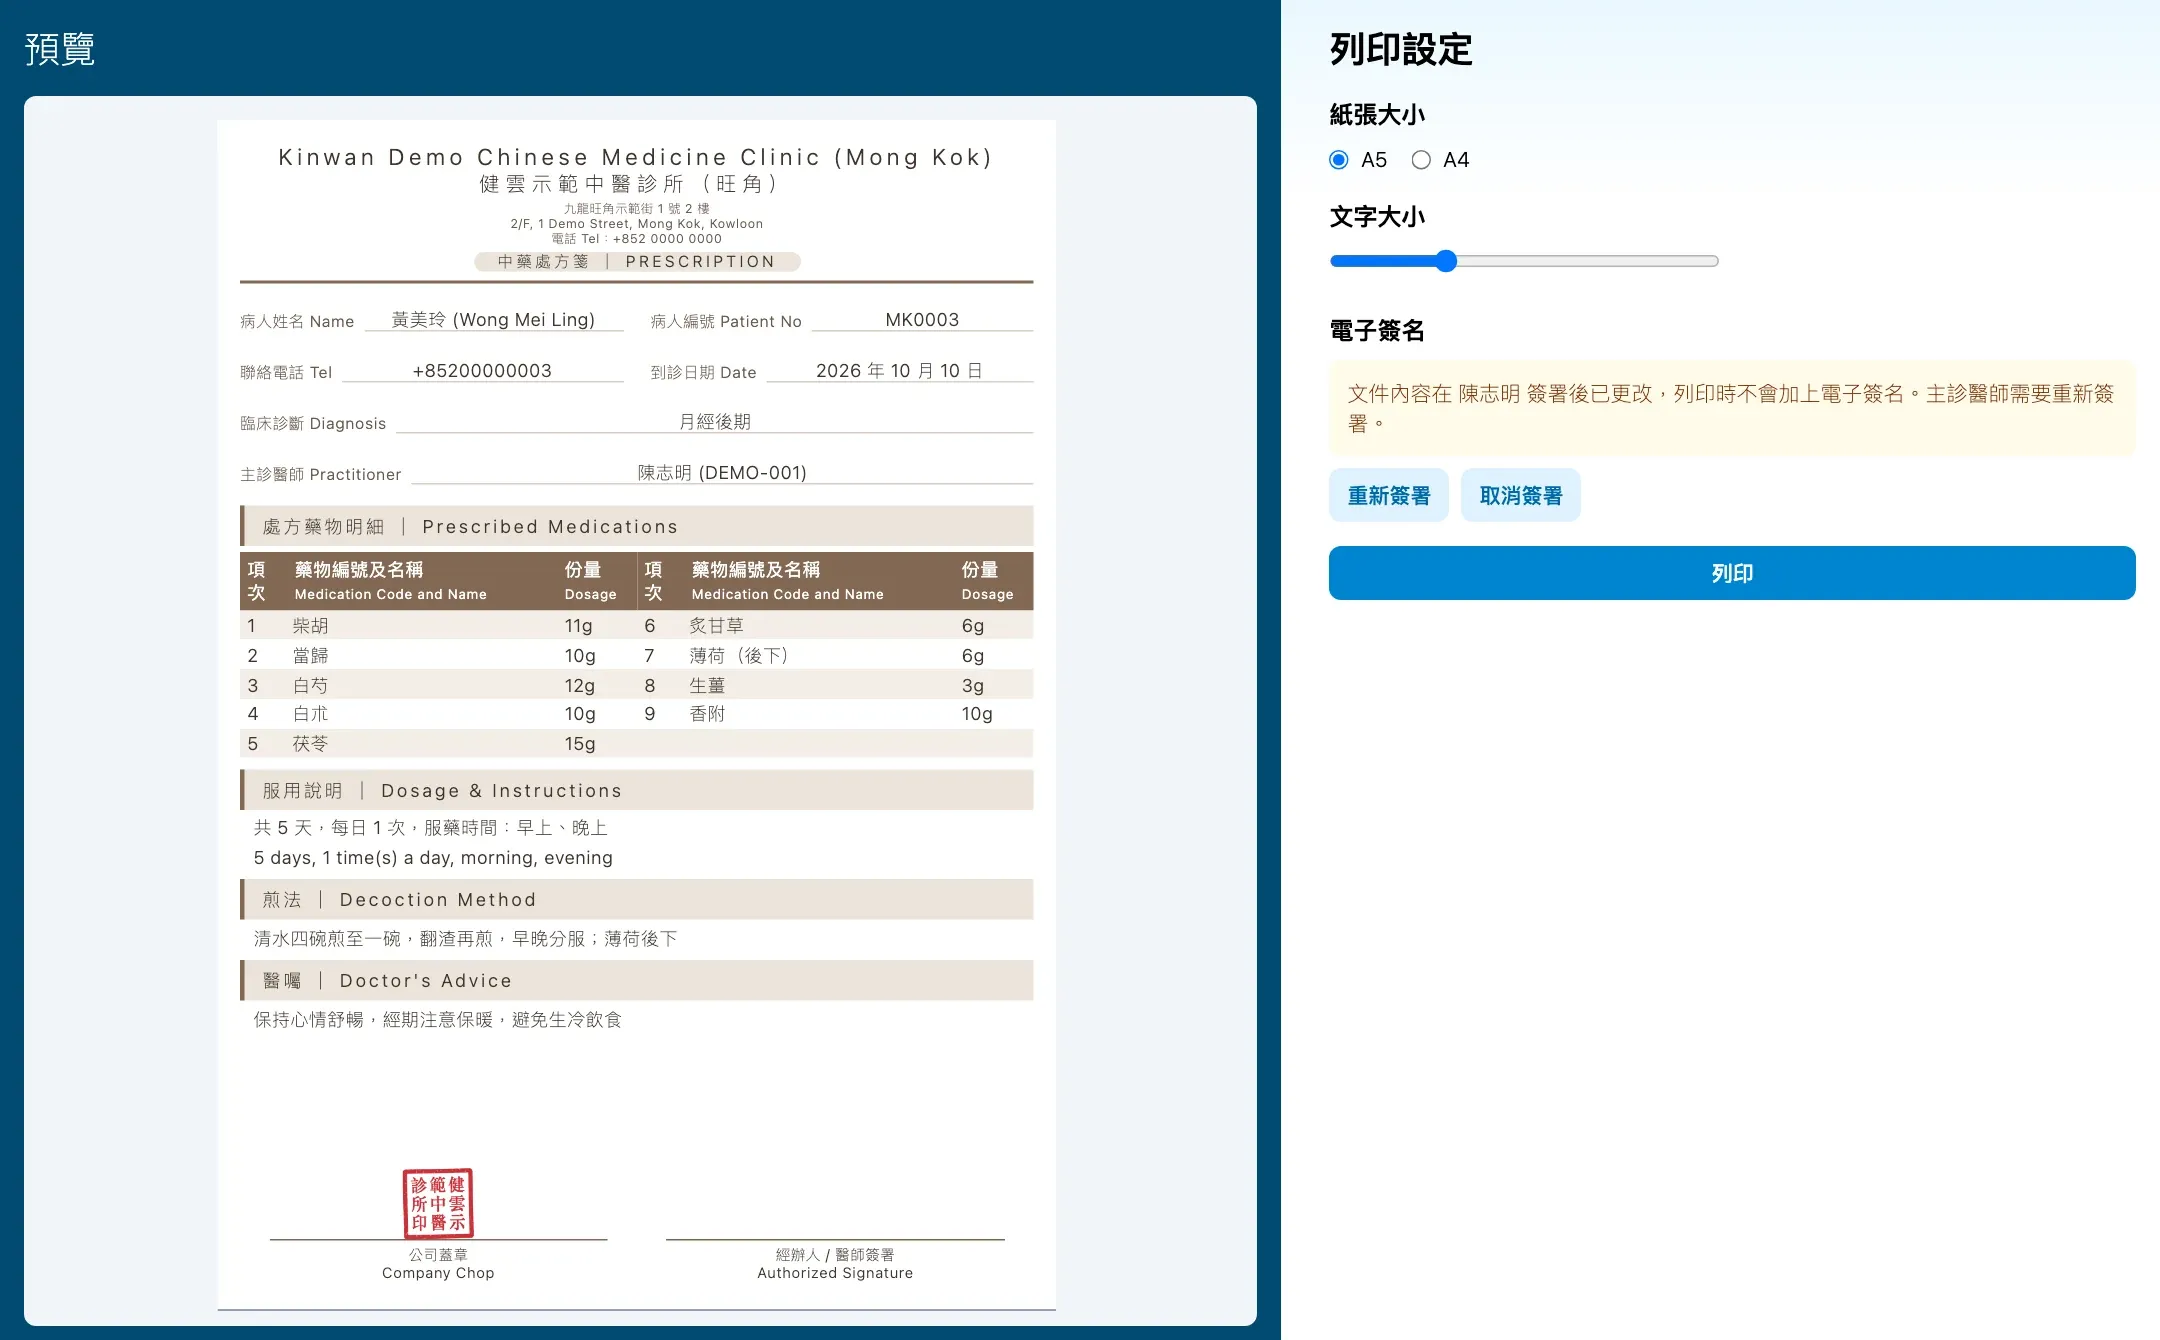
- If the prescription or the print settings behind a signed document change, the signature stops printing and the page asks the doctor to sign again.
- The chop and signature print on the template’s existing chop and signature lines, so the layout does not move.
| Document (template) | Clinic chop | Doctor signature |
|---|---|---|
| Prescription (Style 5) | ✓ | ✓ |
| Receipt (Style 2) | ✓ | ✓ |
| Insurance invoice | ✓ | |
| Sick-leave certificate | ✓ | |
| Attendance certificate | ✓ |
Setting up and signing
- Under clinic settings › clinic details, upload the clinic chop and use the image editor to crop it and remove the white background.
-
Under clinic settings › print templates, switch on 「顯示診所 chop」 (show clinic chop) and 「啟用醫師電子簽名」 (enable doctor e-signature) for the templates you use.
-
Each doctor draws or uploads a signature under personal settings › e-signature.
- On the print page, press 簽署 and confirm. If the document changes after signing, the print page says so and the doctor presses 重新簽署 (sign again).
New to Medicloud? Try it free for 3 months, no credit card